


Everyone who is familiar with PC Gaming knows the trouble of wrestling with graphics settings. For some reason or another, the newest games dip in frames and you can't get the smooth 60 FPS you so desire. So you try to adjust the settings, but what do you go for? What do the settings even mean and how will it affect your PC, more concretely your CPU and GPU? Find all the answers to your questions here!
What follows is a list of all the most common graphics settings, what they mean and how they will affect your CPU and GPU. A super handy little guide that you should keep bookmarked, in case you want to look up anything about PC Gaming graphics settings.
- READ MORE: FUT 21: Customizing Your Stadium


Resolution
Measures the number of horizontal pixels being output to a display by the number of vertical pixels (i.e. 1920 x 1080). A higher resolution means you'll see more detail regardless of your other graphics settings, but it also means your PC needs to render those extra pixels, too.
- Set this as high as your display will support, and only lower this if your performance is severely suffering. This is often the last setting you will turn down, as it has the greatest performance cost to visual benefit ratio.
- CPU: Low
- GPU: Moderate – Exponential cost increase
- Processing Cost: Moderate
- Memory Cost: Moderate
Refresh Rate
This describes how many times the image on your monitor is updated (refreshed) per second. It's measured in hertz (Hz). Most modern games will auto-detect the appropriate settings. Oftentimes this setting is ignored based on the VSync setting. If you have a high end gaming monitor, you could potentially have something as high as 165Hz. Some games have enforced FPS/refresh caps. Bad PC ports, or games that depend on the FPS ceiling for physics event calculations (Bethesda games are a good example of this) will typically cap this at either 30fps or 60fps even if your monitor and hardware are capable of rendering the game faster. This setting does not directly improve or worsen CPU/GPU costs. It can be used to lighten the load if you’re looking to save on energy or improve stability by setting it lower, or, if set higher, used to improve input latency and accommodate higher end displays . “Unlimited” settings imply that VSync will be disabled.
- READ MORE: All Original Bunker Codes in CoD Warzone!
Vertical Sync (VSync)
This is an important setting that ties into refresh rate. Without Vsync enabled, your graphics card is free to render frames at a rate higher than your monitor can actually display them. This often has the benefit of improving laggy framerates, improving input latency, and improving unstable framerates so they aren’t as noticeable. With VSync enabled, it limits the number of frames output to your display at either the auto-detected refresh rate of the display, or the manually set refresh rate on the game settings.
- Turn this on only if you experience screen tearing. Vsync can result in input lag, as well as performance troubles if your PC can't maintain 60 frames per second.
- CPU: No simple and clear answer, but it doesn't seem to matter for the most part.
- GPU: Same thing. If you can’t maintain 60+ fps normally, it’s going to get a lot worse when you enable this.
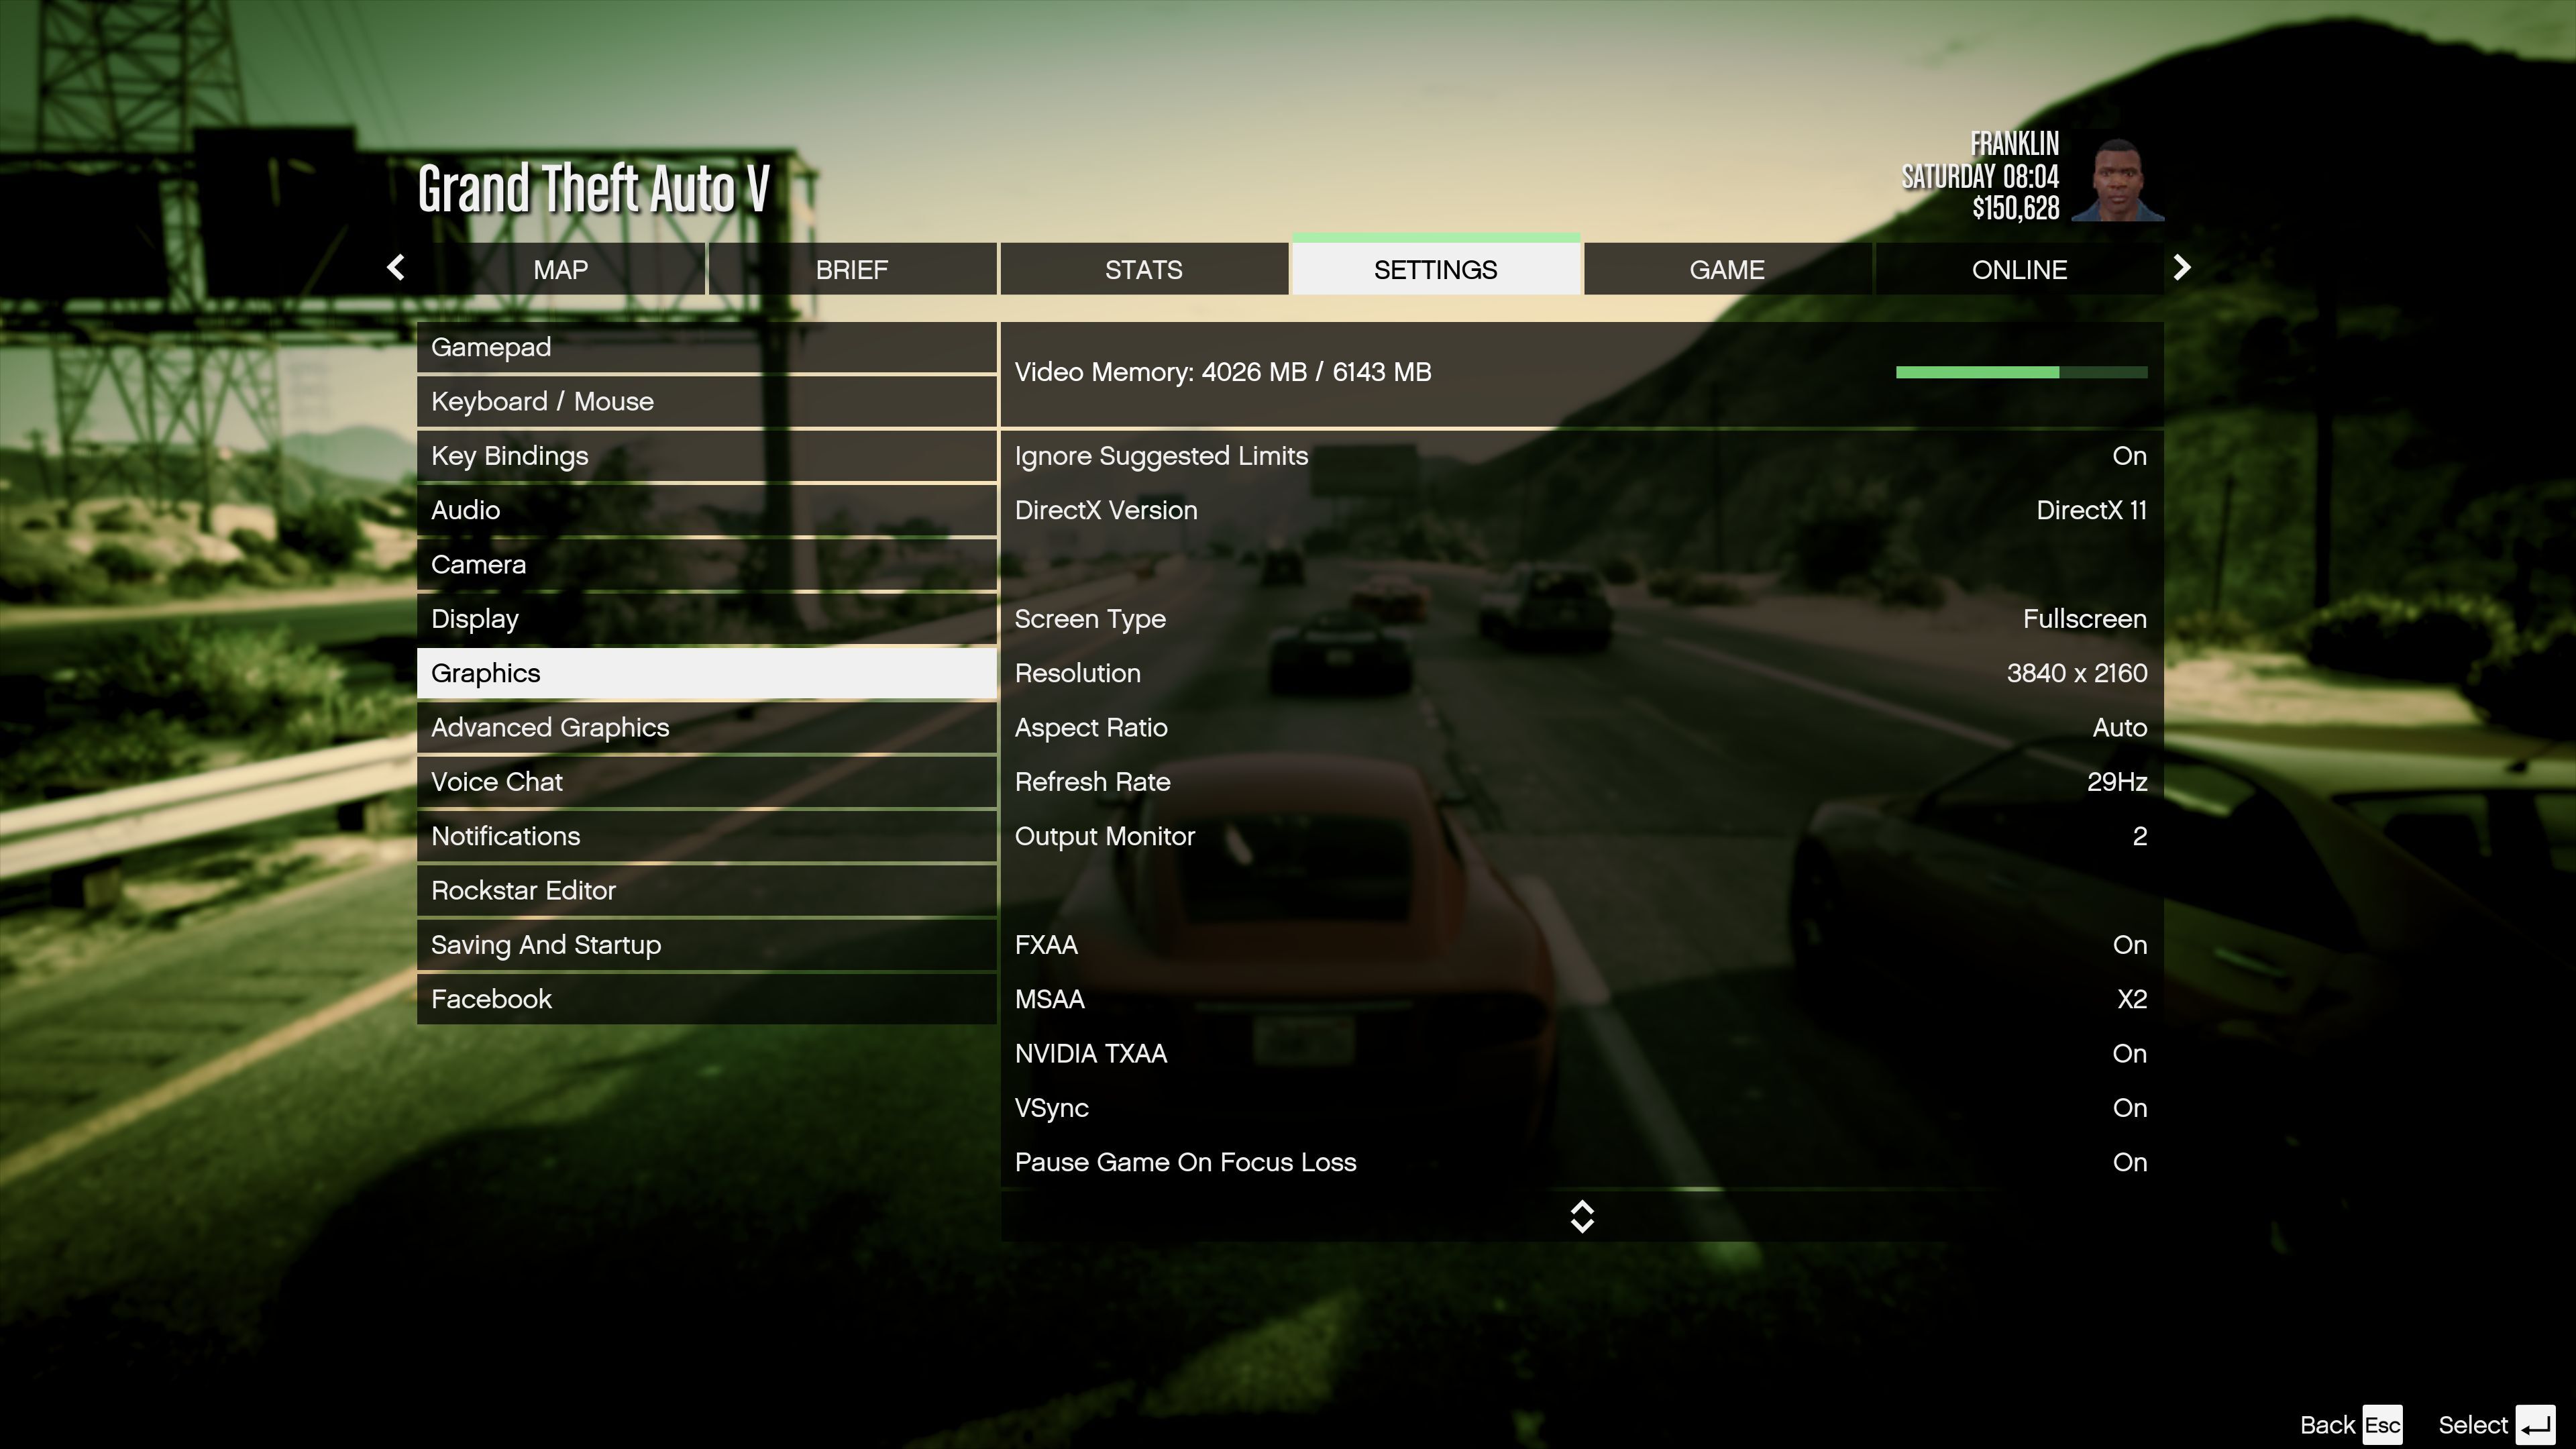
Anti-Aliasing (AA)
Anti-Aliasing is a graphics filter that attempts to get rid of those jagged edges produced by lines that aren’t perfectly horizontal or vertical, and make the game look far smoother. There are different types of AA, which we will go through here:
- Fast Approximate Anti-aliasing (FXAA): The fastest and least process-heavy mode of anti-aliasing. It is slightly blurrier, but so much faster, that you can usually afford to at least have this on.
- CPU: Moderate
- GPU: Moderate
- Multisampling Anti-aliasing (MSAA): MSAA is a particular type of anti-aliasing that tries to be smarter, and less system-intensive, by applying itself only to the parts of each frame that will look jagged, rather than across the entire frame. The result is good, but you may still see some jagged lines here and there.
- CPU: Low
- GPU: High
- Temporal Anti-aliasing (TXAA): This is MSAA but with an extra step. TXAA takes into account previous frames to produce its own next frame by averaging the colours. This means the motion of a jagged edge affects the way TXAA smooths it. Though TXAA is Nvidia-exclusive, AMD's own version of this is called MLAA.
- CPU: Low
- GPU: Moderate
Each successive increase (2x, 4x, 8x, 16x) is an exponential cost increase. Adjust this setting last or almost last after you’ve gotten your other settings and have some spare performance. Typically a 2x FXAA will drastically improve the appearance over default, especially for First-Person Games.
Anisotropic Filtering (AF)
This setting affects the depth and clarity of textures. For example, if you look at a brick wall, arguably it’s “flat.” With no AF, it will appear blurry and without definition. With 16x, it’s going to look a lot more like a real brick wall, with varying heights and bumpiness and definition. Crank this setting up. The performance impact is barely noticeable and the benefit is absolutely massive. This should be the second-to-last setting you ever lower, and the second setting you increase, after resolution.
- CPU: Negligible-Low
- GPU: Low
Screen Space Ambient Occlusion (SSAO)
This setting simulates shadows around the edges of objects. These shadows are simulated and are not generated due to dynamic lighting. Some games have objectively better SSAO visual quality and performance than others based on the game engine and therefore the performance impact will also be different with every game.
- CPU: Low-Moderate
- GPU: Low-High – Depends on the rendering engine
- Processing cost: High
- Memory cost: Low
Depth of Field
This setting blurs distant objects and objects that should be out of focus based on where you are looking. Each game blurs a little differently. Some users prefer DoF, some hate it. Some games aggressively blur for a cinematic effect, while others very passively blur to achieve a sense of realism.
- CPU: Low
- GPU: Low-Moderate
Level of Detail
Instead of blurring the distant objects (which hampers performance), this process simply reduces the complexity of them (which improves performance). This is accomplished by either loading lower resolution textures for them, using lower complexity 3D models, or a combination of both. Setting this to “off” means distant objects are loaded in full scale. Setting this to “high” means distant objects are reduced in quality as much as possible.
- CPU: Low
- GPU: Moderate – Scales with number and complexity of distant objects
Draw Distance (Render Distance)
Similar to how Level of Detail lowers the complexity and fidelity of distant objects to improve performance, this setting will simply not render/draw distant objects. There is a very noticeable “pop-in” of objects when they enter the draw distance if the distance is short. Sometimes this is masked with a draw distance fog or static blurring.
- CPU: Moderate-High
- GPU: High-Extreme
- Processing cost: High-Extreme
- Memory cost: Moderate-High
And that's it! We are done!
Good luck with tackling your PC Gaming settings. If you liked this, you should check out MyEarlyGameto personalize EarlyGame to your taste.
READ MORE:
For more gaming and esports news, stick to EarlyGame. Get in touch with us on Discord, or engaged through our Twitter and Facebook. Remember to check out our YouTube channel!