


Casablanca is one of the two new maps that came into Call of Duty: Vanguard with the Season 2 update. But unlike Gondola, Casablanca has huge potential as a competitive map for ranked play and the CDL. Here's a complete map guide to Casablanca, including all the objective locations for Hardpoint, Control, and SnD.
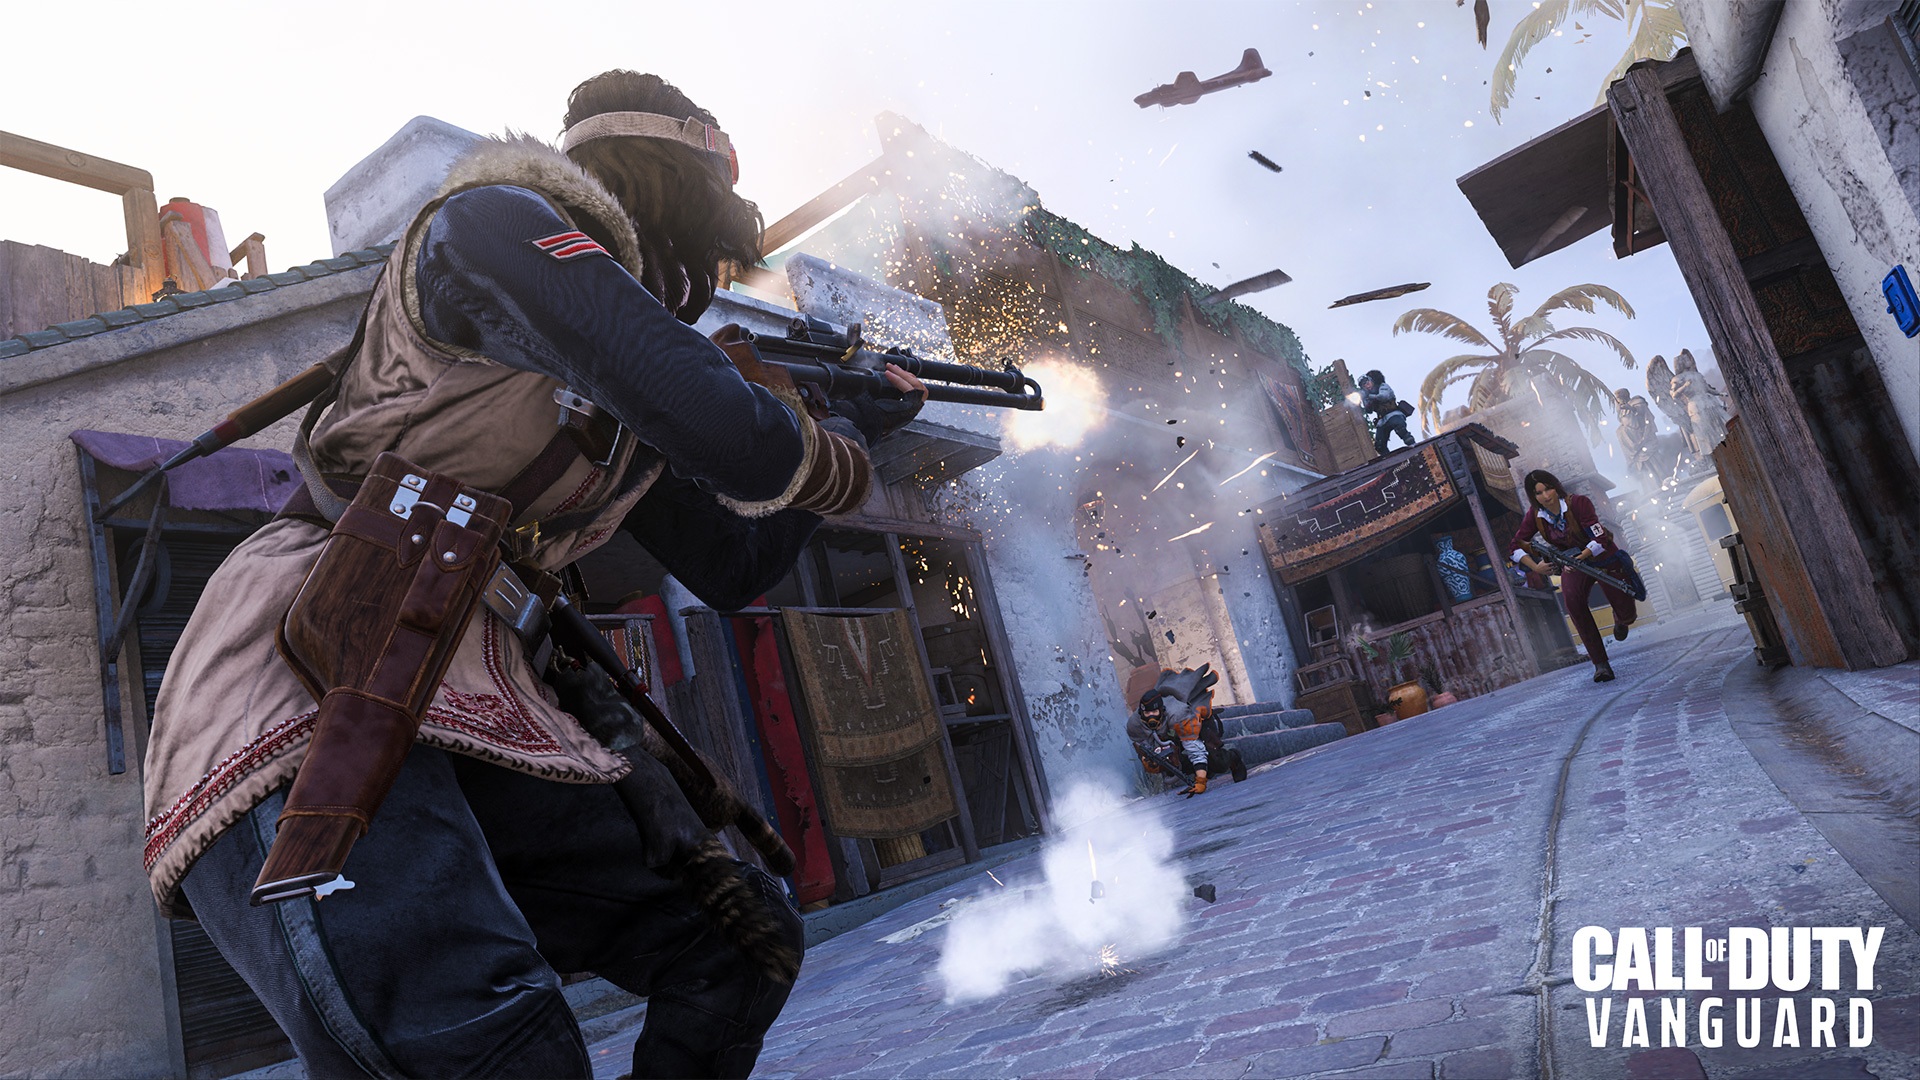
Casablanca came into Call of Duty: Vanguard as a new map with Season 2. The map is meant to capture the winding roads and patchwork architecture of an inner-city market. And it's a very good map. It's symmetrical, the spawns work, the size is good, and there are three clear lanes of play without too many angles to cover. For that reason, it's going to be the next contender for the competitive map pool (used in ranked and the CDL), and so we've put together a comprehensive map guide for all the competitive modes on Casablanca.
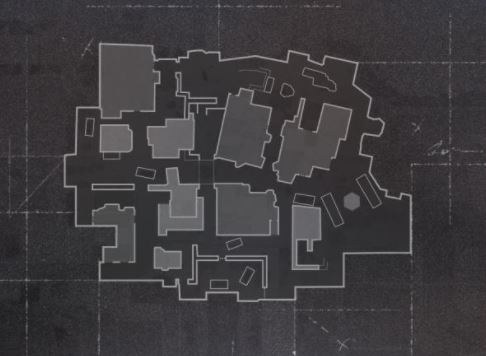
Casablanca Overview
You can see an overview of Casablanca beneath, both teams spawn on either the far west or far eastern pockets of the map to start. The map is about the same size as Decoy, so small-medium, and perfect for most 6v6 modes. On Blitz, this map will turn into Shipment, but that's the aim of Blitz combat pacing after all.
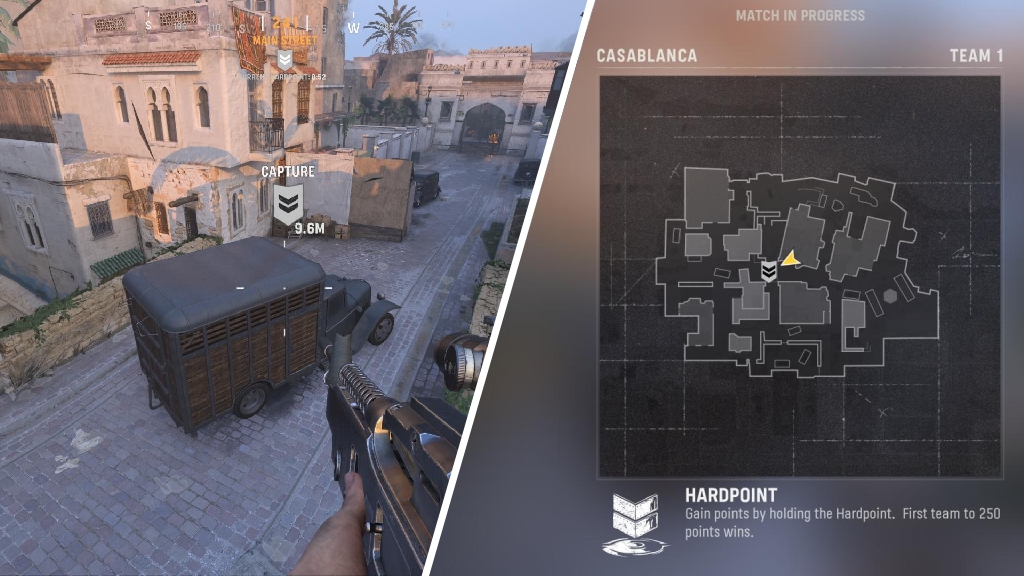
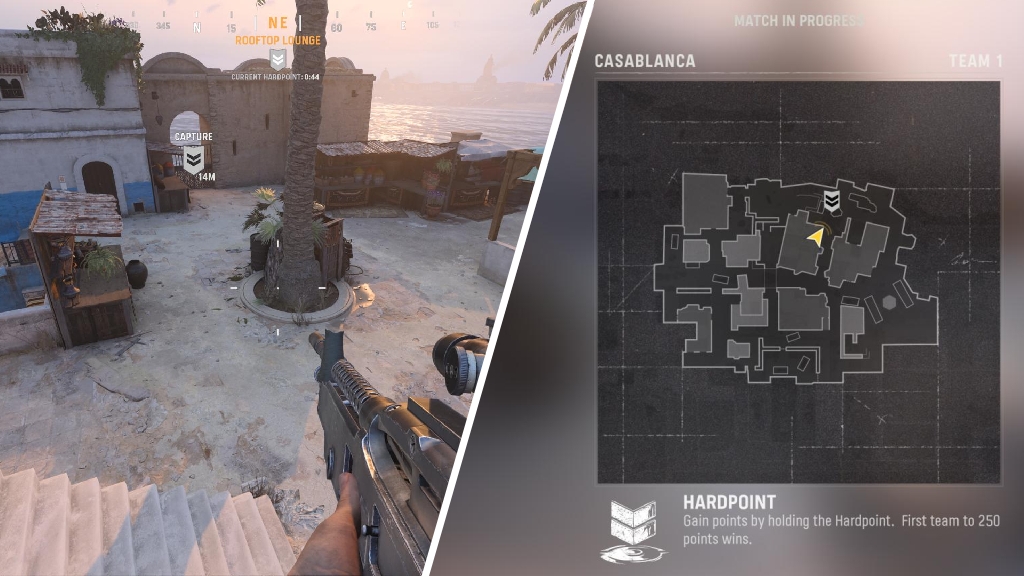
Casablanca Hardpoint
Casablanca P1
P1 is going to be next to impossible for most teams to hold for any significant period of time. It can be hit from a lot of different angles, and there's next to no cover. If you start on the western side of the map, you will have a slight advantage and will be able to set up the rotation to P2 more easily.
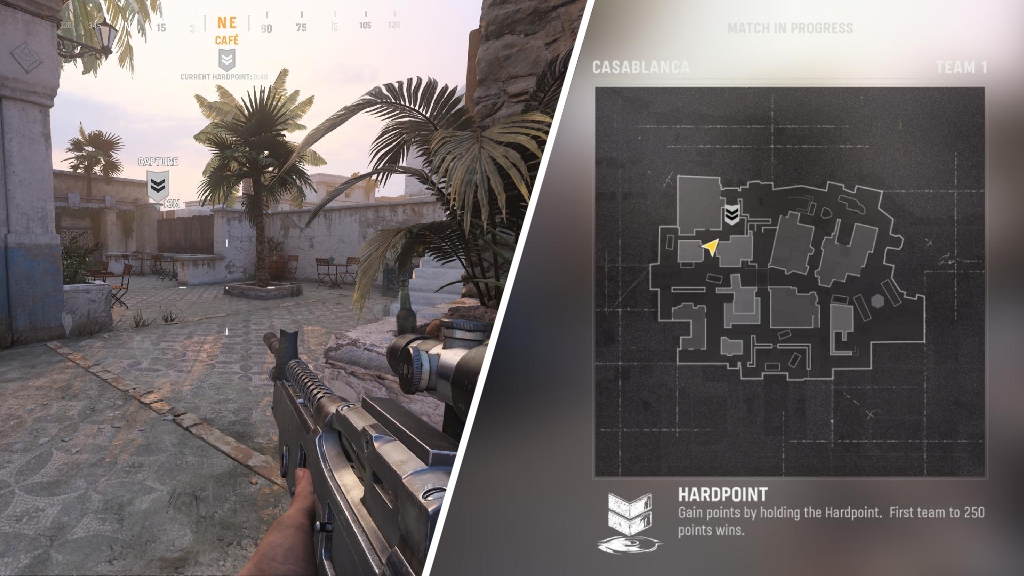
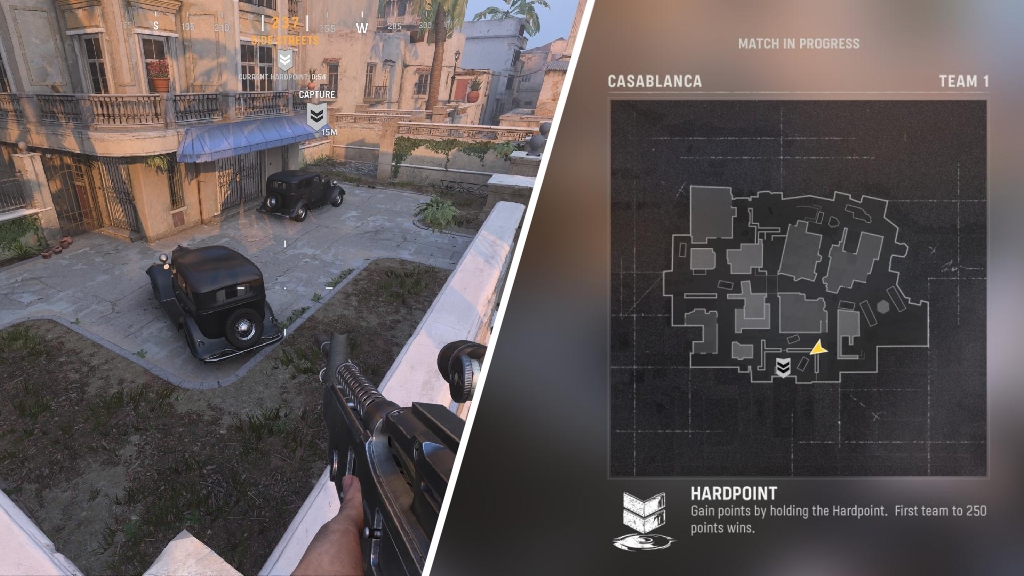
Casablanca P2
P2 is a lot easier to hold than P2, but it's still not going to give you an unbreakable setup. There's a great head-glitch you can use while holding down P2 that we describe further down in the Search and Destroy section.
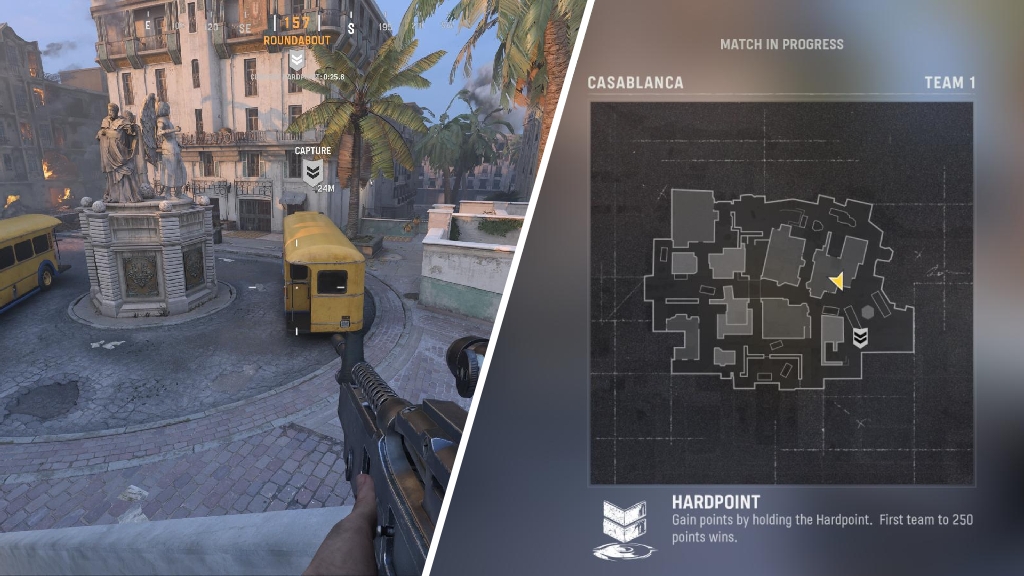
Casablanca P3
This P3 is very well-designed, and should give the team who had a disadvantage taking P1 and P2 a chance to hold up and take some hill time. It's near the back of the map, so you don't have to watch the back, but there are still 3 lanes they could come from to reach P3, so it won't be easy.
Casablanca P4
P4 is going to get mixy. It's very open, and good SMG players should be able to break up all but the best setups at this point. It's not quite as bad as P1, but it's going to be hard to get much time from this point.
Casablanca P5
P5 is used in SnD and Control for an objective location as well. It looks like the best natural hold, but it's deceiving. There are quite a few angles with height that can look into this area, and besides the two cars (which do explode), there's no cover inside these walls. Expect grenades to be going off every second in P5.
Casablanca Search and Destroy
Casablanca A Site
The position we just spoke about (Hardpoint P5) is also the A site in Search and Destroy. An AR on the attacking side can cover all entrances to this site, but the defenders are denied an angle on the attacker's entrance, so it will probably be the more popular site to plant at.
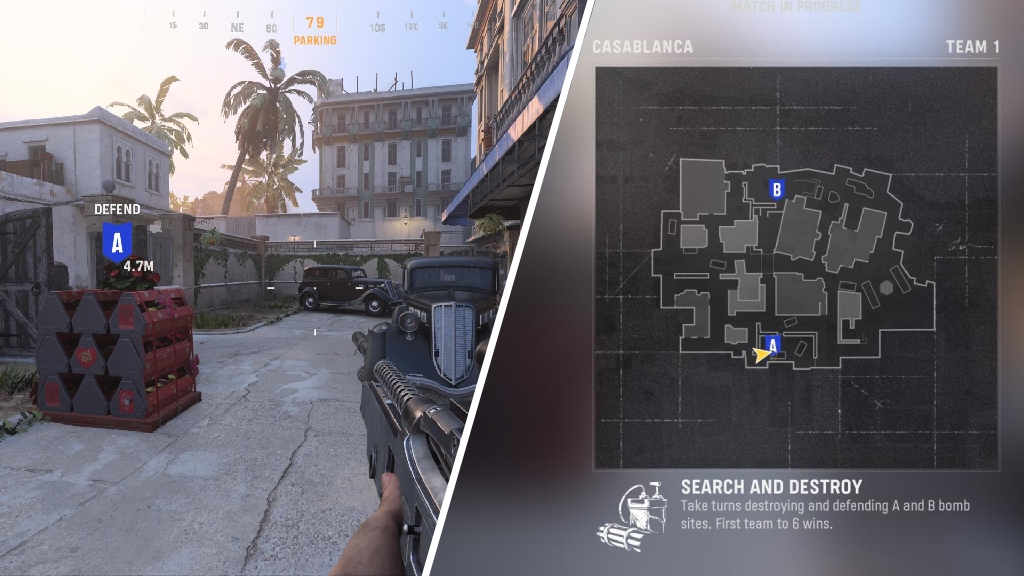
You can see a power position beneath that teams on defense should utilize every round. From this angle you can cover the site, but also turn and have a decent angle over one of the entrances to the B site.

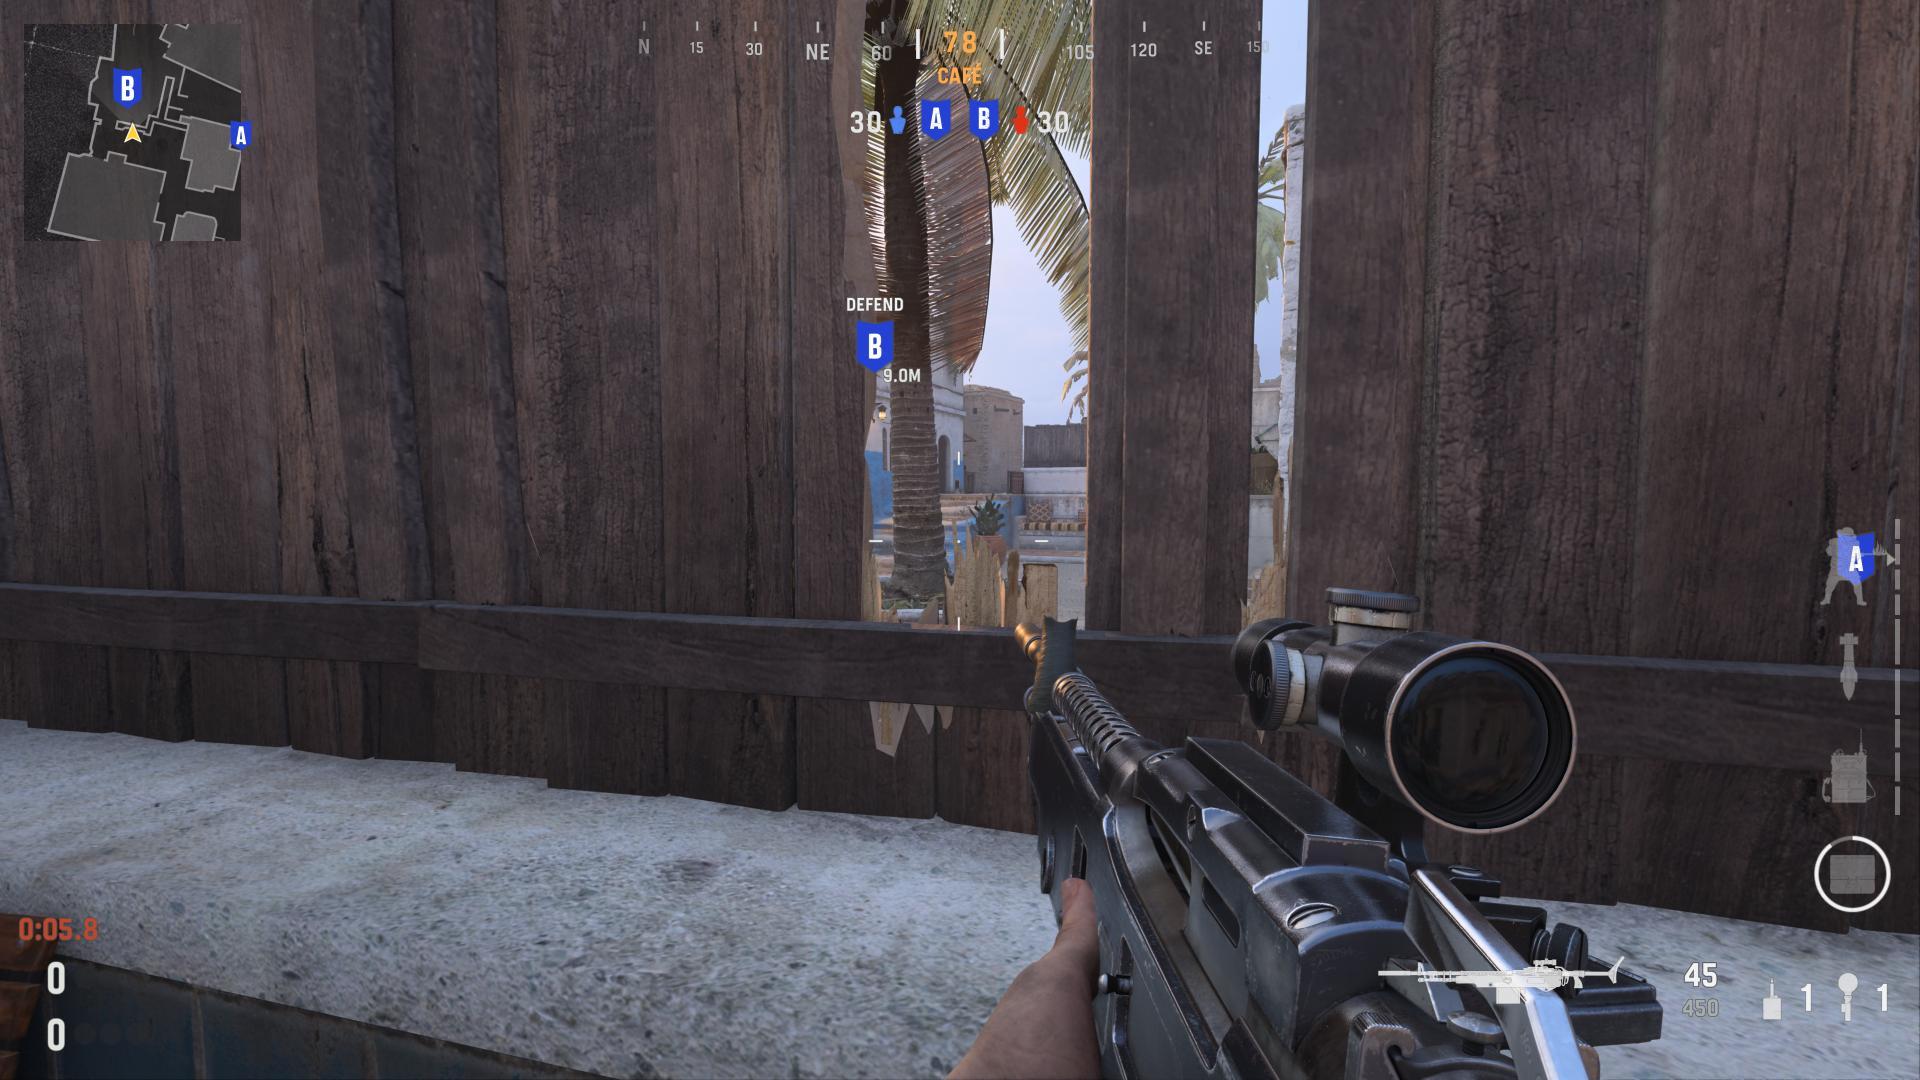
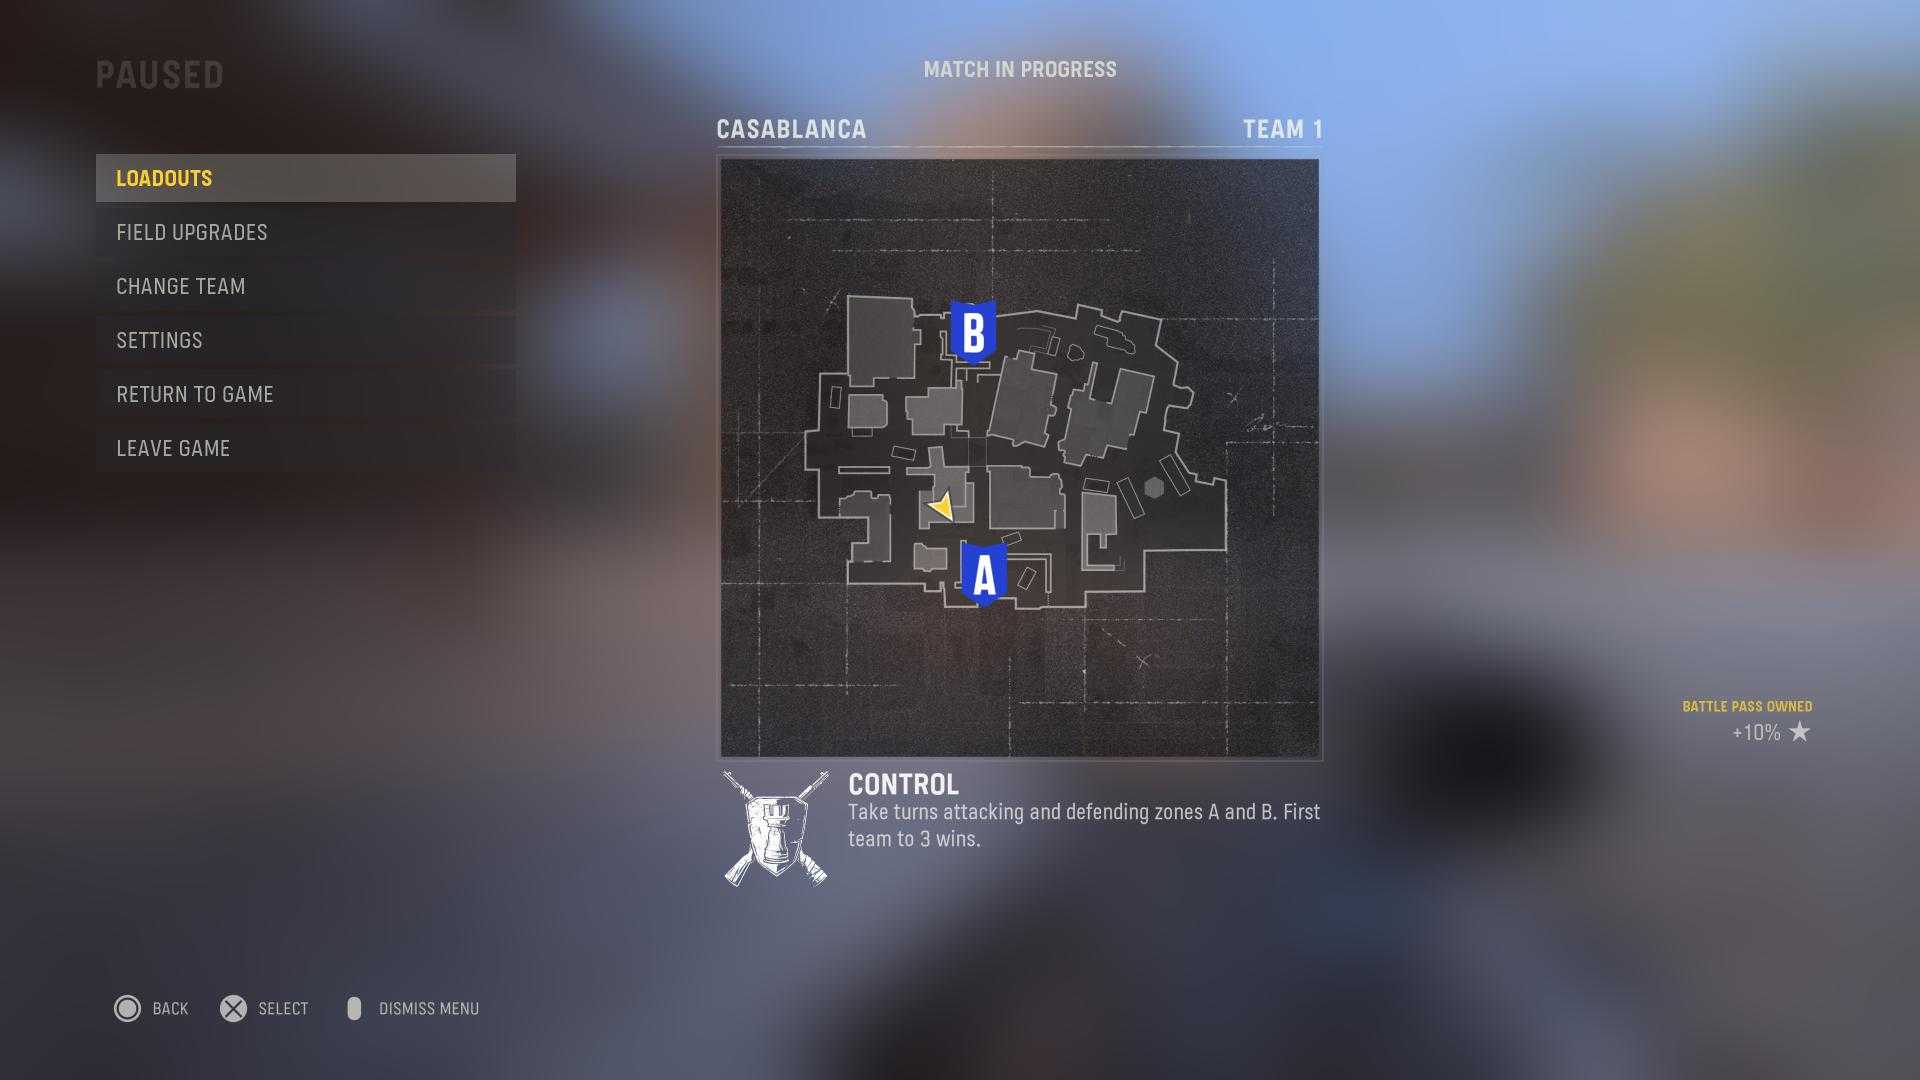
Casablanca B Site
The B site will probably only be used when teams are going for late-game rotations, or trying to throw a Hail Mary. The problem is that it's such an open area to try to plant, and the defenders have such good positions to hold this site.

If you smash the fence beneath as the defenders, then you have a great head-glitch to watch over the B site.
Casablanca Control
Control uses exactly the same sites as Search and Destroy, pictured above, and so you can use the same power positions we mentioned. Our main tip for Casablanca Control is not to immediately chalk A if you're defending. Sure, you probably will lose it, and B will be easier to defend. But you can use grenades and a strong AR to make A difficult for a very long time.
That was our complete overview of Casablanca, so you can start grinding ranked with a head start. While the other map we got in Season 2 was fun, it was a bit too small to be anything but a bit of a laugh in Blitz. But we can expect more maps like this to drop throughout Vanguard's life-cycle. And then we just need to cross our fingers for some better maps in MW2 than we got in MW 2019…