How do you find Misko's Treasure in Zelda: Tears of the Kingdom, you may ask yourself? We'll tell you!
As happens a lot in Zelda: Tears of the Kingdom, one can easily miss opportunities for better equipment, especially in the early game. One of the best opportunities for great gear is the side quest Misko's Treasure. Misko is said to have spent their lifetime collecting clothes, which are now hidden all across Hyrule. There are said to be pieces that "fill the wearer with power", "keep you safe in lightning" and are "quite stylish".
Sounds good to us so far. Where exactly Misko has hidden these treasures and how to get there you'll see.
Misko's Treasure Side Quest
You're given the Misko's Treasure side quest by Meeshy. You'll meet the fashionable adventurer wandering through Hyrule, near stables, on the roads leaving Central Hyrule or outside villages like Kakariko. If you show interest in the story, Meeshy will mark the locations where the armor pieces are said to be hidden on your map. But this wouldn't be TotK if just going there would get you the armor.
- This Tears of the Kingdom OLED Switch is definitely a treasure of its own! Feel free to take a look
Misko's Treasure: Climbing Outfit
If you start your search for the treasures at Lookout Landing, just before the New Serenne Stable, you will find the North Hyrule Plain Cave on the right side of the road. Be careful after entering; you'll have to face two Like Likes. After defeating them, you can use Ascend to get on top of the ledge where one of the Like Like was and follow the path. You'll encounter a chamber with a Bubbulfrog, but you don't need to enter for the treasure: it's hidden behind the waterfall.
The Climbing Gear will increase your climbing speed (who would have thought) and offers a +3 defense.
Misko's Treasure: Powerful Outfit
For this piece of armor, you'll have to cross the Hylia River and enter the Crenel Hills Cave. Beware the Stone Talus! You don't have to fight him, if you don't want to (if you do, but don't know how, we got you!). You simply can use a Bomb Flower to get the Luminous Stone from blocking the entrance to a path, at which end you'll find the Barbarian Armor.
The Barbarian Armor will increase your attacks and also offers a +3 defense.
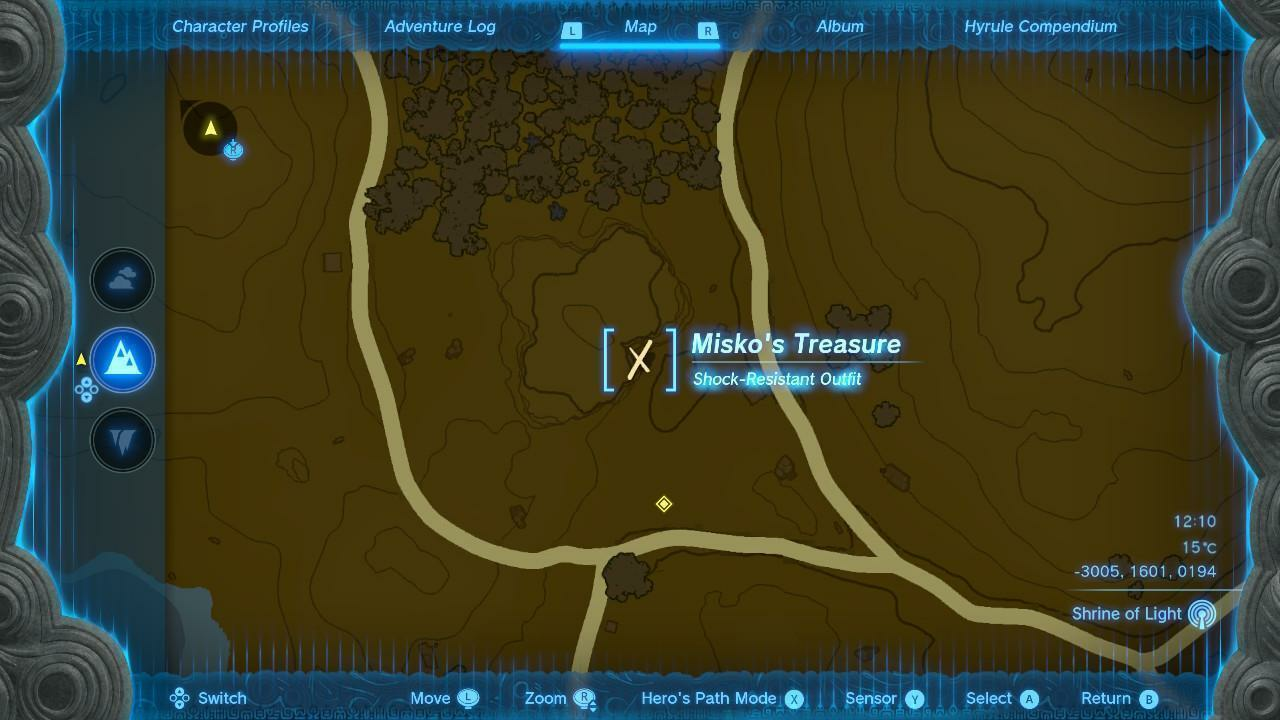
Misko's Treasure: Shock-Resistant Outfit
The last piece of Misko's Treasure is found between the Whistling Hill and Lake Kolomo in the Whistling Hill Cave. To find the cave's entrance, look for the cracked rocks that mark places where you can use Bomb Flowers or a Hammer to smash them. After making your way through the vines that cover the path, you'll face skeletons – fight them or outrun them. In the next chamber you'll find an elevated ledge on the left, once again, use Ascend.
- If you want to protect your Switch, maybe you'd like to do so in a stylish way with this Zelda themed Switch Case
Now be careful as a Like Like is spitting rocks down the ramp aiming at you. Again you could avoid the fight, dodge the beast and continue your path until you reach another cracked stonewall, luckily with a Bomb Flower on the side. With entering the last chamber, you can't avoid the fight if you want that armor piece, because this Like Like is not only blocking the way but also firing electricity orbs at you.
After defeating it and one last time cracking the stones blocking your way, you're finally there and can collect the last one of Misko's treasures, the Rubber Armor. This will also give you a +3 defense and also Shock Resistance.
During your journey, you'll maybe encounter other treasure hunters, mostly dressed in stylish mushroom clothes too. Speak to them, and they maybe reveal another location for pieces of Misko's treasure.
You didn't have to visit the Depths for this treasure hunt, but if you do, this might be useful information:
